Here we go!
I chose a pink calico for my blouse. The directions were not very clear on the yardage, but what you want is twice the length of your shoulder to desired hem, plus half a yard for bias tape, the bow tie, oopsies, etc. For me this was two yards.
The lace is for a panel in the back. You could get a third of yard, and you will end up with some extra.
 You will also need: a washout cloth marker, 1" x 12" quilting ruler, tape measure, fabric scissors (although I like to use my rotary cutter and mat), pins, and thread to match.
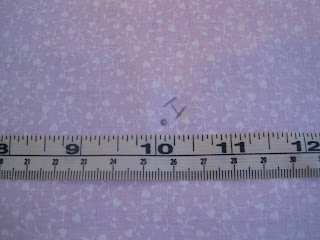
Start by folding according to the directions, and make sure the bottom edge is even. Then mark point C. This is your shoulder to hem measurement plus one inch.
Point D is across from point C, on the selvages.
While we're over here, mark point G 2" down from D.
Point F is 4" to the right of C.
E is on the folded edge a diagonal 6" from F.
This will about the smallest possible neckline for a non-stretch material. Feel free to extend point F for a wider neckline, and point E for a lower neckline.
To get your arm hole measurement, loop a tape measure from the top corner of your shoulder, under your armpit, and together again. You can follow the seam of a well fitting shirt for guidance. Divide that measurement in half and add one inch. I got 11".
Now measure that distance down from C to get H.
Point I is supposed to be one quarter bust measurement plus 3" to the right of H.
Now, as a busty girl, I usually prefer to separate the back and the front measurements to get a better fit. To do this, hold the end of your measuring tape under one armpit. Then wrap the tape around your back to same spot under your other armpit. You now have your back bust measurement and you can simply subtract it from your full bust to get your front bust.
Now I used half my front bust, plus 2" for a slightly slimmer fit, to get point I. I got 14" for that.

Continuing on the same trajectory, mark point J on the selvage. You can also double check this by using your C to H measurement to measure down from D.
Point K is directly below I. To keep everything square I double checked this with the I to J measurement.
Now connect the dots! E to F to G, and J to I to K. Instead of coming to a corner at I give it a slight curve. Cut along your lines and you've got your front!
Now for the back.
Follow the above directions to find points C and F.
Extend point E to 7 3/4" down from C and add an additional point (let's call it E2) and 1 1/2" to the right.
Next find points H, I, and K, only this time using your back bust measurements.
Now for some fancy footwork.
In order to keep the sleeve measurements the same on front and back you will have to change the angles at points F and I. Just be sure all line lengths and the same and the angles at your new points G and J stay square. The picture below demonstrates the change in angles.
And here we have front, back, and lace panel.
I forgot to take a closeup of the lace panel on it's own. It measures 8 1/2" across the top, 4 1/2" across the bottom, and 8 1/2" in length.
Start by matching up one long side of the back neckline with one long side of the lace, right sides together, lace on top.
Sew from the top, with 1/4" seams, until you get 1/4" away from the short edge of the lace. With the needle down, lift the pressure foot and shift the layers to match up the short edges. Pin and resume sewing. Repeat with final long edge. You will need to clip the corners for the seams to lie flat. Press out from the lace. Check to be sure everything look right and smooth, then go back and zigzag the edges of your seams.
Now match the the sides and sleeves, right sides together, front to back. Sew with a 1/4" seam, start from the cuff end for each side. After you have check that everything is right, go back and zigzag the edges.
Now match up the shoulder seams starting at the cuff ends. The front neckline will extend slightly past the back neckline. DO NOT sew on the lace here. Double check your seam then zigzag the edges.
Next you need to make strips for the bow tie collar and some bias tape.
Here is a great tutorial with 3 different ways to make bias tape. Make about 2' of 1" tape (it will be more than you need, but that will vary with how you made your neckline).
 The strip for the collar is approx. 4" x 90" (again, more than you will need, but we'll trim it later.). Cut two 4" x 45" from the uncut end of your fabric and sew two short ends together. Press seam open. Fold right sides together down the long way. Sew with a 1/4" seam to make one long tube, open at each end. Turn inside out and press.
  For the front neckline, turn your blouse right side out. With right sides together, open one side of the bias tape and pin to one side of the "V". sew down the crease to 1/4" past the other side of the "V". Trim tape with some excess. Fold edge of tape back down. Now repeat on the other side.
 Turn inside out again. Fold the tape over the edge and press. You can now trip the ends of the tape to 1/4". Top stitch in place.
 Match the middle, top of the lace to the middle of the collar (the seam), and pin. If your lace has a nice finished edge like this you can pin the collar on the inside like shown.
 Be sure your seam here extends about 1/2 inch into the front neckline as well.
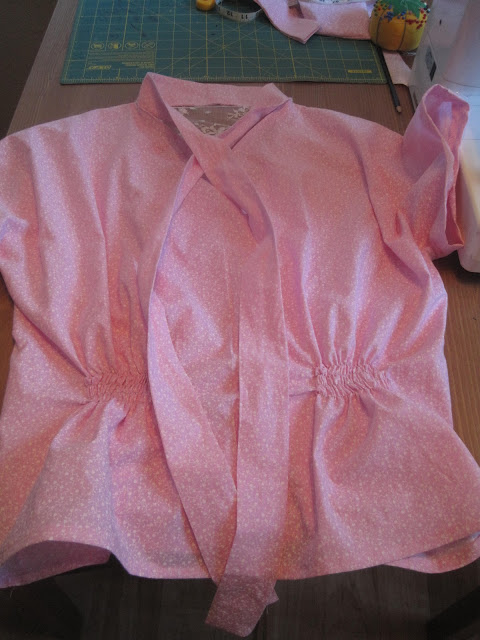
Next is to add some shaping to the body. Elastic thread is fairly new to me, but I'm finding it's a really easy and attractive way to add stretchable shaping. Some tutorials I found helpful are here and here.
 Try on your blouse and see where you need to bring it in and how much. I wanted two gathers in the front and one in the back. And I found I needed to bring in 4" in each of the three gathers. So I drew 4 lines 8" long, 1/2" apart in each gathering spot on the outside.
If it doesn't pull in quite as much as you wanted, you can always just pull some slack out of the elastic threads and tie them off.
Try on your blouse again and decide where you want your sleeves to end. Mark the length on both sleeves and trim with 2" extra for hem.
Check the length of the bow tie and trim to where ever you like. Fold the edges in 1/4" and top stitch shut.
Done!


Wow. Awesome tutorial!!!
ReplyDelete